
Blast Grid guide: charges, power-ups, enemies and every arena hazard
Updated 1 November 2026
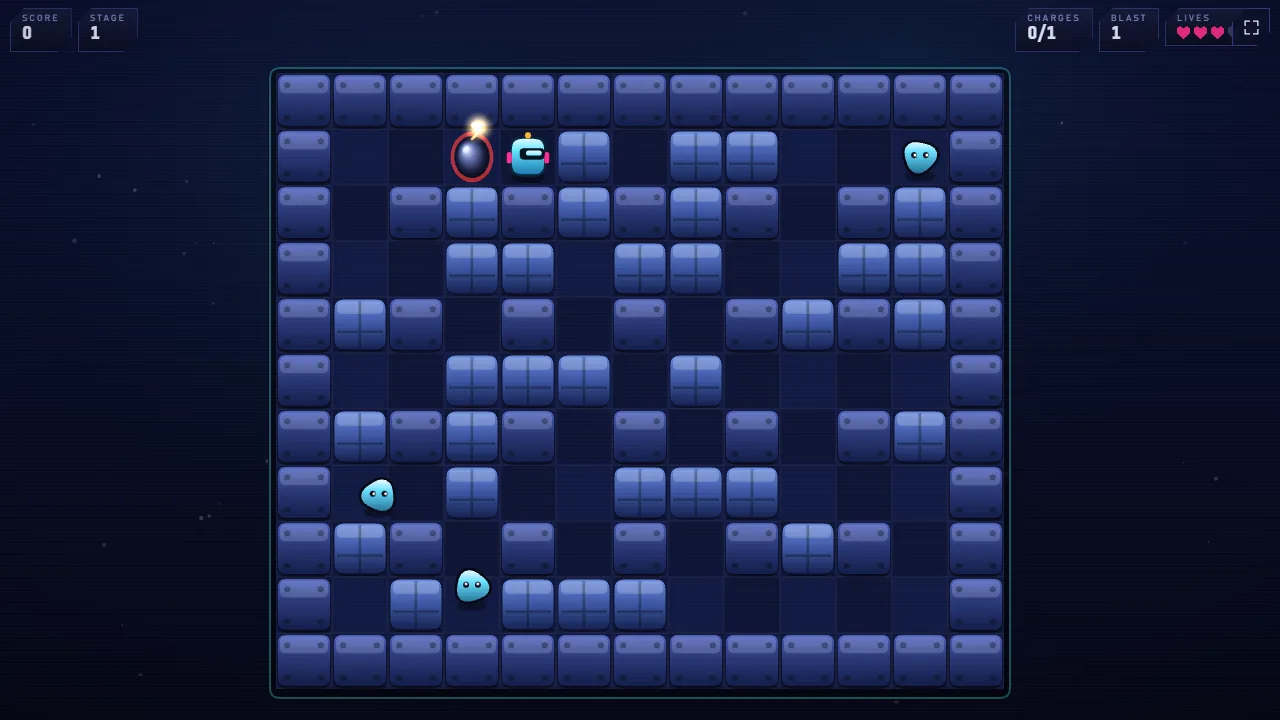
Blast Grid is a grid arena bomb game. You drop a charge, get out of its way, and let it clear blocks and enemies. Wipe out every enemy and a warp gate opens somewhere in the arena; reach it and the arena is cleared. This guide explains exactly how the blasts behave, what every power-up and enemy does, how the floor hazards work, and how the scoring rewards a bit of daring.
Controls
- W A S D or the arrow keys to move, one tile at a time.
- Space drops a charge where you stand.
- E or Shift sets off your charges once you have the Remote Trigger.
- Esc pauses and M turns the music on or off.
- On a touchscreen, drag anywhere on the left half of the screen to move, and use the DROP button. A FIRE button appears when you have the Remote Trigger.
Charges and blasts
- A charge goes off 2.15 seconds after you drop it, ticking every half second, with a sharper tick just before it blows.
- The blast shoots out in the four straight directions from the charge, two tiles each way to begin with. It stops at the solid walls and pillars, and at the first breakable block it reaches, which it destroys.
- Flames last about half a second. Standing in one costs you a life; any enemy caught in one is destroyed.
- You start with one charge at a time. Each one you drop comes back to you when it goes off.
- You can walk off a charge you have just dropped, but not back onto it, and nobody can walk through one. A charge in a corridor is a wall until it blows.
- A blast that reaches another charge sets it off almost at once. That is a chain.
- Power-ups lying on the floor burn away if a blast reaches them, so pick them up before you blow up the area around them.
Getting clear means getting out of both the row and the column of your charge before it goes off. The safest move is usually one step away and one step round a pillar or corner, where the blast cannot turn to follow you.
The warp gate
The gate is hidden under one of the breakable blocks. You may uncover it while clearing blocks, but it only opens once every enemy is gone. If you have not found it by then, the block hiding it breaks open by itself, and WARP GATE ONLINE tells you to go. Walk onto it to clear the arena.
Power-ups
Power-ups are hidden in breakable blocks: four in the first arenas, rising to eight in the last. What each block holds is random, and the chances are roughly:
- Extra Charge (18%): carry one more charge at a time, up to eight.
- Blast Amplifier (18%): blasts reach one tile further, up to nine.
- Velocity Boost (15%): move faster, up to four times.
- Shield (11%): absorbs one hit, from a flame or an enemy.
- Mystery Core (9%): see below.
- Blast Pass (7%): flames cannot hurt you for 18 seconds.
- Piercing Blast (7%): your blasts tear through blocks instead of stopping at the first.
- Phase Walk (7%): walk through breakable blocks for 12 seconds. If it runs out while you are inside one, you are put back out on open floor.
- Remote Trigger (6%): your charges stop ticking and wait for you. Press E, Shift or FIRE to set off all of them at once. A charge caught in another blast still goes off.
Upgrades stay with you from arena to arena for the rest of the run, and through a lost life. Only the timed ones, Blast Pass and Phase Walk, run out.
The Mystery Core is a gamble. About six times in ten it gives you one of the good upgrades at random. Otherwise it is one of three bad ones: Sludge slows you to about half speed for eight seconds, Dampener cuts your blast range by one tile (never below two), and Misfire takes away one charge (never below one). Late in a run, when you have a lot to lose, it is fair to leave one on the floor.
The enemies
You move at a little over four tiles a second. Against that:
- Drifter: slow, wanders, and is the least likely to notice a charge in time. 100 points.
- Seeker: a little faster, and comes after you when you are within about twelve tiles. 160.
- Sprinter: very nearly as fast as you are without a Velocity Boost, and changes direction a lot. 200.
- Wraith: slow, but drifts straight through breakable blocks. A blast that reaches the block it is inside still destroys it. 240.
- Sapper: plants charges of its own, two-tile blasts that hurt you and other enemies just the same, then runs for cover. 300.
- Warden: quick, plants charges, hunts you from across most of the arena, and takes two hits. The first knocks it out of the flames with a moment's protection. 600.
Every enemy tries to step out of a blast it can see coming, the smarter ones more reliably, so the best traps are charges dropped where an enemy has to walk, or a chain that closes off its escape. Touching an enemy costs you a life.
Floor hazards
From the third campaign arena, the floors start to fight back, one hazard at a time and then in combinations:
- Crumbling floor (from arena 3): a cracked tile falls away as you step off it, leaving a hole nobody can cross for about six and a half seconds. Think before you walk a route you will need to come back along.
- Ice (from arena 4): step onto it and you keep sliding in the same direction until something stops you, and you cannot turn back mid-slide.
- Conveyors (from arena 5): each pushes you one tile in the direction of its arrow, and several in a row will carry you further.
- Flame vents (from arena 6): every four and a half seconds a vent erupts for nearly a second. Its flame kills you and enemies just like a blast.
- Portals (from arena 7): come in pairs. Step on one and you come out of the other. Enemies use them too.
The arenas also grow, from 13 by 11 tiles in the first three to 17 by 13 in the last four, and the six arena looks, Coolant, Foundry, Biolab, Voidnet, Glacier and Reactor, change every two arenas.
Lives
You have three lives. Lose one and you start again in the top left corner, which is cleared of blocks, with any enemies near it moved away and a couple of seconds of protection. Your upgrades stay. You gain a life after every fourth arena, up to five.
Score and combos
- Every enemy you destroy, every chain of two or more blasts, and every close call (standing right next to a blast as it goes off) adds to your combo. The combo lasts 3.4 seconds after the last of them, and losing a life ends it.
- Enemy points and close calls are multiplied by the combo: an extra quarter for each step, up to four times at a twelve-step combo.
- Chains pay 45 points for each blast in them, blocks pay 15, and power-ups 75.
- Clearing an arena adds a time bonus, 900 points minus 6 for every second it took, and 250 for each life you have left.
So the best scores come from setting off groups of enemies together with chains, and from standing just out of the blast rather than far away.
The modes
- Play campaign: twelve arenas. Your progress is saved, and the menu shows the arena you are up to. Coming back to it starts a new run from that arena, with three lives and none of the upgrades from before.
- Endless arena: waves that never end. Each one has more enemies, new kinds can join every two waves, with the Warden possible from wave 9, hazards join from wave 3, and the arena grows. Your best wave and score are saved.
- Quick battle: one random arena, ninety seconds to clear it and reach the gate. Time running out ends the battle.
Settings and effects
Before the first game you choose full effects or reduced flashing. Reduced flashing dims the blast flashes and cuts the screen shake right down. Settings lets you change that at any time, and has separate controls for screen shake, particle detail and a performance mode for slower devices.
Tips
- Plan your exit before you drop. Know which corner you are going round before you press Space.
- Grab every Extra Charge and Blast Amplifier you uncover. More charges and longer blasts make every later arena easier.
- Be careful with long blasts in narrow corridors. A blast that reaches nine tiles reaches you too, if you are in its line.
- Do not blow up your own power-ups. Collect what a block drops before setting off the next charge nearby.
- Use chains. Set two charges so the first sets off the second, and the score and the combo both jump.
- Watch Sappers' charges as closely as your own. They hurt you just the same.
Ready to play?
Blast Grid runs in your browser, free, with nothing to install. Play Blast Grid now, or browse the categories for something else.
More guides
- Playing online with friends
- Keepsies: a guide to mibs, marbles and the eight Rings
- Little Bubbling: a guide to brewing, selling and staying out of the cells
- Syphon's Slap Arena: how to slap harder, defend and win the Slap League
- Chaos Island: how to survive every disaster
- Camp Kindling: a guide to your first nights
- Tall Tails: a fishing guide
- Contrail Cup: planes, stages and racing tips
- Pulsar League: a beginner's guide to rocket football
- Resonance: Two Voices guide: playing with your voice, both roles and the bosses
- Shrap guide: weapons, maps, modes and winning gunfights
- Packfall: playing with your dog, and staying alive
- Acheron: a guide to your first escape
- Secret of Rapture: a spoiler-light guide
- Veyrfall: a tactics guide to the Broken Dominion
- Los Pantalones guide: story, gangs, money and losing the cops
- Sigilclash guide: card rules, captures, deck building and the campaign
- Drakonia guide: hatching, care, missions, battles and evolution
- Dragon Egg Traders guide: towns, prices, poachers and reaching 100,000 gold
- Greenside: a golf guide to all nine holes
- Road Riot: a guide to fighting, racing and staying out of handcuffs
- Scorch Circuit guide: weapons, the championship, upgrades and staying alive
- Pocket Grand Prix guide: drifting, turbos and faster laps
- Snowbound guide: faster runs, clean landings and every gate
- Lockdown: Undead strategy: how to survive more rounds
- Survillian guide: how to survive, level up and prestige
- Protocol: Biomass guide: survive longer in the dark
- Voidlance guide: weapons, the Prism Core and all five bosses
- Tilt guide: three stars, every world and the level editor
- Neon Rush tips: how to run further and score higher
- SydeScroller guide: jumping, obstacles, power-ups and longer runs
- Encore guide: cues, ghosts, the Hook and how to last longer
- Lineflow guide: how to build tracks that flow
- Physics puzzle games: Cannon Crush, Gravity Breaker, Bankshot and Frog Delivery Service
- Short story games: Scales of Justice, Department of Lost Things, One Minute to Extinction and more
- Quick arcade games: Freefall, Reality Rumble, Prism Pop, Snack Attack, 60 Second Sketch and Breakout
- Blackjack basic strategy: when to hit, stand, double or split
- How to play Texas Hold'em: hands, odds and position
- 8 ball pool rules: fouls, ball in hand and how to win
- How to play pinball: rules, scoring and tips for both tables
- Air hockey rules and tips: how to score and defend
- Bowling scoring explained: strikes, spares and the 10th frame
Spotted something out of date? Games here are updated often, so tell us through the contact page and we will fix the guide.