
Voidlance guide: weapons, the Prism Core and all five bosses
Updated 1 November 2026
Voidlance is a side-scrolling space shooter. You fly to the right through five sectors, each ending in a boss, with a hull of four, three spare ships and two novas. This guide explains how firing really works (holding the button is not rapid fire), what the Prism Core is for, what every pickup gives you, and how to take each boss apart.
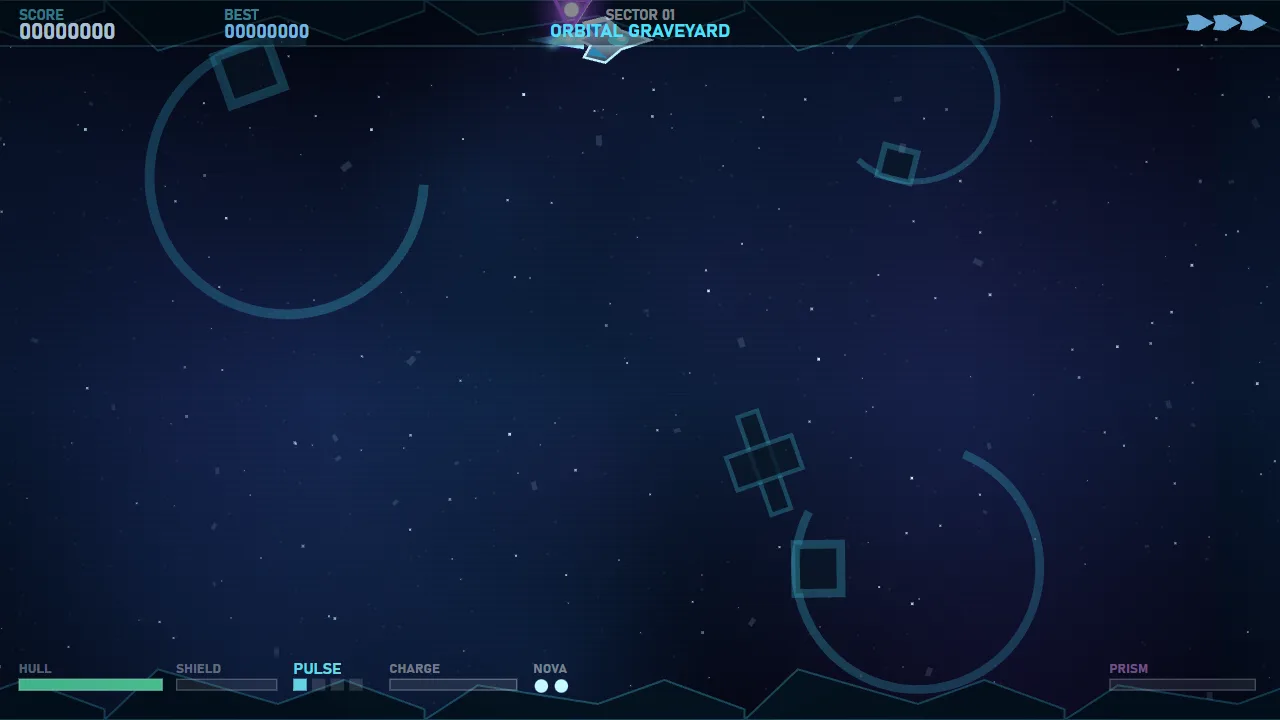
Controls
- Fly: arrow keys or W A S D.
- Fire: Space, Z or J. Tap it for rapid fire; hold it to charge a shot.
- Prism Core: Shift, X or K launches it forward or calls it back.
- Nova: C or L.
- Esc or P pauses, F goes fullscreen and M turns the music on or off.
- On a touchscreen there is a stick for flying and FIRE, CORE and NOVA buttons. The game needs landscape and pauses if you turn the device upright.
The game opens with a photosensitivity warning and a Reduced Effects option, which damps the flashes, strobes and screen shake without changing the game. Settings also has the difficulty: Pilot, or Veteran, where enemies and bosses have about 30% more health and their shots fly faster.
Firing and charged shots
Each press of fire shoots for about a third of a second, which is several shots, so to keep firing, keep tapping. If you hold the button longer, your gun stops and starts charging instead, shown on the CHARGE bar at the bottom of the screen:
- Level 1 after about 0.8 seconds of holding: 22 damage.
- Level 2 after about 1.4 seconds: 48 damage.
- Level 3 after about 2.1 seconds, when a chime plays: 90 damage.
Let go to fire. Every charged shot passes through everything in its path, including the front shields that block your normal shots. Let go before level 1 and you just fire an ordinary shot. For scale, an ordinary Pulse bullet does 1 damage.
The four guns
You start with the Pulse at power 1. Power pickups add shots, up to power 4, shown as four pips beside the gun's name. Weapon pickups move you on to the next gun, in a fixed order: Pulse, Spread, Ripple, Lance, then back to Pulse. There is no other way to change gun.
- Pulse: 2 to 5 parallel shots straight ahead, and the fastest rate of fire.
- Spread: 3 to 6 shots in a fan, for screens full of small craft.
- Ripple: 2 to 5 shots that weave up and down, a little stronger, and each passes through one enemy (two from power 3).
- Lance: one heavy bolt that passes through three or more enemies, and from power 3 two lighter bolts beside it. The slowest rate of fire.
Pickups drift towards you when you get close, so if you are happy with your gun, steer well clear of a W.
The Prism Core
The Core is the glowing prism that circles your ship. While it is docked, it damages anything it touches and swallows any enemy shot that flies into it. Every shot it swallows fills the PRISM meter at the bottom right a little; when the meter is full, the Core bursts into Refract, fourteen homing splinters that seek out enemies.
Press the Core button and it flies forward and anchors near the right of the screen. Out there it follows the height of the nearest enemy, fires twin shots five times a second, damages whatever it touches, including bosses, and still eats enemy fire. Press again and it flies home, hurting anything it passes through on the way back.
So the Core is a shield and a second gun at once. Keep it docked when the fire is coming at you, to soak it up and charge Refract, and launch it when a big enemy or a boss sits on the right of the screen.
Nova
You start with two novas and can carry up to five. A nova wipes every enemy shot off the screen and sends out a ring that does 60 damage to every enemy it reaches and 220 to a boss. It is a panic button, but also a big chunk of boss health: the first boss has 950.
Pickups
Some enemies carry a pickup, usually the first of a wave, and any other kill has a small chance of dropping one at random. The letters mean:
- Crystal (no letter): 250 points. The most common drop.
- P: one more power level. At power 4 it is worth 1,500 points instead.
- W: the next gun.
- S: eight seconds of shield, up to twelve. A hit while shielded costs three seconds of shield instead of hull.
- H: one point of hull back, or 1,000 points if your hull is full.
- N: one more nova.
- O: overdrive for eight seconds. You fire about 60% faster and fly 15% faster.
Hull, spare ships and score
- Your hull is 4. Every shot, collision or beam that touches you takes 1, then you have a moment of invulnerability.
- Flying into an enemy destroys it but still costs you a point of hull. Drifting rocks are not destroyed when you hit them.
- When the hull runs out you lose a ship. You have three spare ships, shown at the top right; you come back with a full hull and a couple of seconds of invulnerability, but one power level lower. You keep your gun, your novas and the Core's charge.
- Clearing a sector pays 1,200 points per point of hull left, 4,000 per spare ship and 800 per power level above 1. Destroying a boss is worth 12,000 points, plus 4,000 for every sector after the first, and each separate part of a boss you destroy is worth 1,200.
- After the fifth boss, Loop +1 starts again at the first sector with tougher enemies, more boss health and faster shots, and kills worth 50% more per loop. Your best score and loops cleared are saved.
The sectors and the enemies to watch
The sectors are the Orbital Graveyard, the Crimson Bio-Reef, the Ion Storm Corridor, the Machine Foundry and the Hive Nexus. Each is a little over a minute of waves, getting longer as you go, then a WARNING and its boss. Enemies get a little tougher in every sector. Most are simple, but a few need a plan:
- Guards carry a curved blue shield on the front that blocks normal shots. Use a charged shot or the launched Core, or clip them on the top or bottom edge, outside the shield.
- Mines burst into a ring of eight shots when you fly close or when they are destroyed, so shoot them from a distance.
- Lancers show a flickering red line, then charge straight along it at great speed. Move off the line.
- Snipers show a pink aiming line, then fire one very fast dart along it.
- Hunters chase you, and burst into five shots whether you destroy them or they run out of time.
- Splitters break into two fast shards aimed at you, and pods spit shards of their own.
- Carriers are big and slow and keep launching swarms; bombers lay mines as they go. Bring these down quickly.
The bosses
Every boss fights in phases. The health bar at the top has white marks where each new phase begins, and the moment a phase changes, every shot on screen disappears. A boss's separate parts, its turrets, nodes or arms, take damage that also counts against its main health, and destroying them silences the fire they were adding.
Beams are announced with a warning line and a rising tone, then sweep across in front of the boss in less than a second. Watch which way the beam starts to move, and get to the side it has already passed.
- Warden MK-II (Orbital Graveyard): two turret pods above and below the core fire aimed bursts, while the core throws rings and spreads. At 55% it opens up: a sweeping beam, denser rings, hunters and quick aimed shots. Destroy the pods first.
- Carrion Bloom (Crimson Bio-Reef): a flower that fires aimed pairs, releases pods and sprays a long waving stream. From 62% it adds rings and stray shots; from 30%, a green line warns of a lashing beam.
- Stormcaller (Ion Storm Corridor): four nodes circle it and fire at you, and it adds a beam and spinning rings. From 60% it calls down zaps: horizontal lines that follow your height for a moment, then strike. Keep moving up or down while a zap line is following you, so it strikes where you were. Take out the nodes when they swing within reach.
- Foundry Titan (Machine Foundry): two arms fire bursts at you, then it sends a long diagonal wall of heavy green shots; get above or below it. When its jaw opens, a fan of nine heavy shots follows. From 62% it adds streams of fast darts, mines and a beam. Destroy the arms.
- Nexus Sovereign (the Hive Nexus): six shards circle it and fire aimed pairs, alongside rings and two crossing beams. From 66% it summons hunters, shards and pods and fires a thirty-shot sweep; below 33% it adds huge rings with darts and constant stray fire. It has by far the most health, so arrive with novas.
Tips
- Tap, do not hold, unless you mean to charge. Holding fire for a second in a busy wave leaves you not shooting at all.
- Charge between waves and in front of bosses, where one level-3 shot through every part is worth a lot of tapping.
- Let the Core eat the fire. Docked, it soaks up shots aimed at you and charges Refract for free.
- Save novas for bosses, especially their last phase, when the screen is fullest and 220 damage is a big bite.
- Do not ram things. Every collision costs hull, and so does a rock.
- Keep your spare ships. Each one left at the end of a sector is worth 4,000 points.
Ready to play?
Voidlance runs in your browser, free, with nothing to install. Play Voidlance now, or browse the categories for something else.
More guides
- Playing online with friends
- Keepsies: a guide to mibs, marbles and the eight Rings
- Little Bubbling: a guide to brewing, selling and staying out of the cells
- Syphon's Slap Arena: how to slap harder, defend and win the Slap League
- Chaos Island: how to survive every disaster
- Camp Kindling: a guide to your first nights
- Tall Tails: a fishing guide
- Contrail Cup: planes, stages and racing tips
- Pulsar League: a beginner's guide to rocket football
- Resonance: Two Voices guide: playing with your voice, both roles and the bosses
- Shrap guide: weapons, maps, modes and winning gunfights
- Packfall: playing with your dog, and staying alive
- Acheron: a guide to your first escape
- Secret of Rapture: a spoiler-light guide
- Veyrfall: a tactics guide to the Broken Dominion
- Los Pantalones guide: story, gangs, money and losing the cops
- Sigilclash guide: card rules, captures, deck building and the campaign
- Drakonia guide: hatching, care, missions, battles and evolution
- Dragon Egg Traders guide: towns, prices, poachers and reaching 100,000 gold
- Greenside: a golf guide to all nine holes
- Road Riot: a guide to fighting, racing and staying out of handcuffs
- Scorch Circuit guide: weapons, the championship, upgrades and staying alive
- Pocket Grand Prix guide: drifting, turbos and faster laps
- Snowbound guide: faster runs, clean landings and every gate
- Lockdown: Undead strategy: how to survive more rounds
- Survillian guide: how to survive, level up and prestige
- Protocol: Biomass guide: survive longer in the dark
- Blast Grid guide: charges, power-ups, enemies and every arena hazard
- Tilt guide: three stars, every world and the level editor
- Neon Rush tips: how to run further and score higher
- SydeScroller guide: jumping, obstacles, power-ups and longer runs
- Encore guide: cues, ghosts, the Hook and how to last longer
- Lineflow guide: how to build tracks that flow
- Physics puzzle games: Cannon Crush, Gravity Breaker, Bankshot and Frog Delivery Service
- Short story games: Scales of Justice, Department of Lost Things, One Minute to Extinction and more
- Quick arcade games: Freefall, Reality Rumble, Prism Pop, Snack Attack, 60 Second Sketch and Breakout
- Blackjack basic strategy: when to hit, stand, double or split
- How to play Texas Hold'em: hands, odds and position
- 8 ball pool rules: fouls, ball in hand and how to win
- How to play pinball: rules, scoring and tips for both tables
- Air hockey rules and tips: how to score and defend
- Bowling scoring explained: strikes, spares and the 10th frame
Spotted something out of date? Games here are updated often, so tell us through the contact page and we will fix the guide.